
IT'S ON ITS WAY!
- Dec 7, 2019
- 8 min read
Updated: Dec 8, 2019


Winterizing your home is no fun when it is already 20 degrees Fahrenheit outdoors, and sleet is already falling. Even worse is having your sprinkler system burst from frozen lines because you didn't get around to purging the system before freezing weather set in.
Fall is the time to get winterized in preparation for the season. Proper winterization involves a systematic review of your home's HVAC equipment as well as the critical structural and mechanical systems. Take care of these elements before winter, so you can enjoy the snow in cozy comfort and not worry about your home.


Test run: Turn the thermostat to heat mode and set it to 80 degrees, just for testing. You should hear the furnace turn on, and warm air should begin to blow within a few minutes. If the furnace is running fine, turn the thermostat back to its normal setting. If the furnace not running properly, you can try to diagnose it yourself. Depending on what's wrong, you may be able to fix it yourself, or you may need to call a qualified service technician.
- Seasonal maintenance: Either have the furnace checked by a service technician or do this work yourself. Most seasonal maintenance tasks are well within a homeowner's skill range.
- Replace the air filter: Put in a new, clean air filter. It's easy, and doing so will ensure a free flow of air and a cleaner environment. Each furnace has its own requirements for air filters, so follow the manufacturer's recommendations. A monthly replacement of the air filter is usually recommended.
- Check fuel supply: If you have a propane or fuel oil furnace, make sure to have your fuel storage tank is topped off and ready to go.
- Inspect and clean heating vents: Clear obstacles to heating vents, so air can freely flow. Many experts recommend having a service technician come in and clean the vents every year or two.
- Check for carbon monoxide leaks: This silent killer can easily be detected with either an inexpensive test badge or battery-operated alarm. If you discover problems, call in a professional to identify and correct the cause of the CO leak. Usually, this involves leakage in the exhaust system of a furnace or other fuel-burning appliance, such as a water heater. Don't put this work off; a CO leak is a very dangerous situation.
- Check exhaust vents: Some furnaces and boilers, as well as gas water heaters, vent through a chimney, while newer high-efficiency models may vent through plastic pipes running through a side wall. Make sure these vents are open and free of obstructions. A vent that hasn't been used all summer may have become home to birds or other animals, which can block the vent pipes and interfere with the furnace's ability to burn efficiently and properly vent exhaust gases.


Often neglected is one of the most important components of a cooling system—the condensing unit outside that churns away in the heat of summer. This component needs a little attention, too, as winter approaches:
- Clean the condensing unit of debris: Using a hose with the spray-head set to the highest pressure, clean the fan blades and condensing coils clear of debris and dirt. Let the unit dry completely before covering it for the season.
- Cover the condensing unit: Left unprotected, the condensing unit can be damaged by wet leaves and debris that contribute to rusting and freezing of internal components. Although these units are designed for outdoor use, covering them with a breathable waterproof cover made for that purpose goes a long way to extending the life and efficient performance of the unit.
- Winterize window air conditioners: As for window air conditioners, remove them if possible and store for winter. Left in windows, these appliances are very hard to seal effectively against winter drafts. If they can't be removed, then close the vents and make sure to get an air conditioning cover similar to the condensing unit cover described above.


Although largely ignored in warm weather, the wood-burning fireplace and chimney can be a major source of cold air leaks and other issues in winter. So the chimney and fireplace need some inspection and service before winter sets in.
- Clear obstructions. Check to make sure the chimney is clear of any nests from birds, squirrels or other small animals.
- Check the damper. Make sure it opens and closes fully, and that it is can be locked in the open or closed position.
- Check the chimney draft. Make sure the chimney will draw up the fire and smoke properly. Test this by taking several sheets of newspaper and rolling them up. Then with the fireplace damper in the open position, light the newspaper in the fireplace. The smoke should rise up the chimney. If it doesn't, you have an obstruction and need to call a professional in to clean the chimney of creosote and ash and possible debris.
- Have the chimney cleaned. If it has been several years (or never) since you had your fireplace chimney cleaned, have it done by a professional chimney sweep. This is not a pleasant DIY project, and professional cleaning is not very expensive.
- Inspect the firebrick in the fireplace. If you see any open mortar joints, have them repaired immediately. A fire can spread into the stud wall behind the masonry firebrick through open mortar joints.
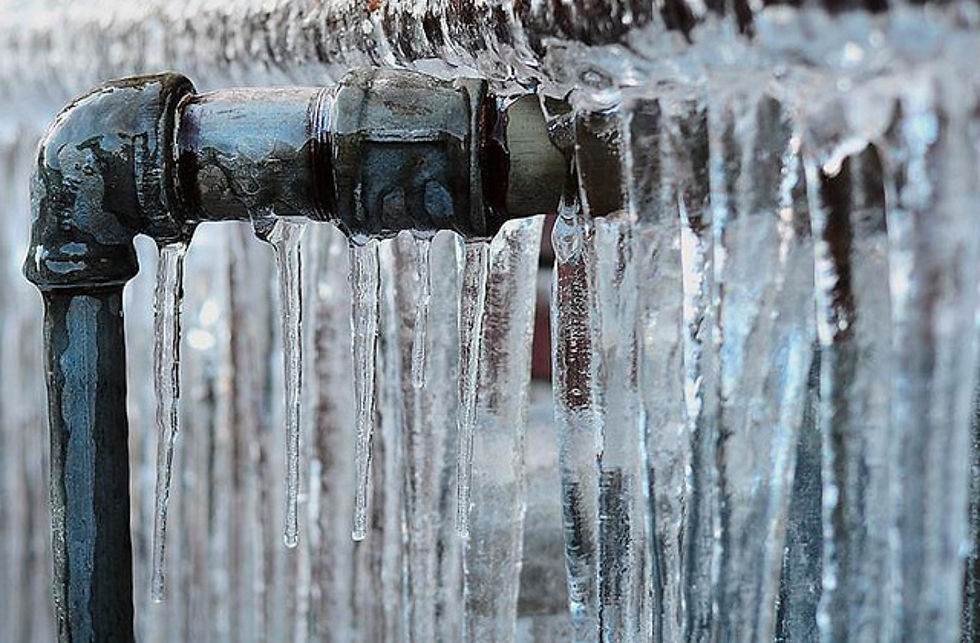

Water supply pipes are especially susceptible to cold weather and freezing. Burst pipes from freezing can cause some of the most expensive repairs in the home. Water supply pipes are most susceptible to problems, but exposed drain pipes can also occasionally freeze. So it is important to systematically review the plumbing pipes in your home.
- Insulate exposed piping: If you have any exposed water pipes in uninsulated spaces, such as in a crawlspace, attic, exterior walls, etc., make sure to insulate them—at a minimum with foam insulating sleeves. Ideally, you should wrap them with electrical heating tape first, then insulate them.
- Exterior faucets: Known as hose bibbs or sill-cocks, the exterior faucets need to have their water supply turned off inside the house, and you also need to drain water from them by opening up the exterior faucets. You may also want to consider an insulated cover for the hose bibb. And remember to disconnect your garden hoses from the sillcocks or outside faucets, and drain them.
- Seasonal shut-down: If you are shutting down a property for several months to leave for the winter, you should always shut off the water supply and drain the plumbing system. If a leak were to occur when you are not present, the damage could be catastrophic.


Serious insulation upgrades are not something to do hurriedly right before winter. A home that is in serious need of more insulation should be carefully evaluated and the work completed carefully during warm months. But there are some areas you can easily insulate to help prepare for winter.
- Insulate your hot water heater with an insulating blanket you can buy at the hardware store.
- Insulate exterior outlets and switch plates with inexpensive foam sealing gasket.
- Seal unused fireplaces. If you don't use your fireplace often and it leaks air, you can cut a piece of fiberglass insulation and stuff it into the fireplace behind your glass doors to block the cold air coming down the chimney. Of course, you need to remove this whenever you use the fireplace.


Infiltration of cold air from air leaks around doors and windows is a significant contributor to your heating bill, just as is poor insulation in the walls and ceiling. An easy way to reduce your heating bill is to reduce these drafts with simple weatherstripping.
Windows
- Inspect the outside moldings around windows for damaged or missing caulking. Use a good-quality exterior caulk to seal any gaps you find around window moldings.
- Older windows with traditional glazing putty holding the glass panes in the frames may have cracked and fallen out. Reglaze any windows that have missing glazing putty.
- Inspect window tracks and clean them of any debris that might be interfering with seals.
- Inspect the locking mechanisms on all windows work adequately. You will want to lock them securely once winter sets in.
- Check for air leaks. On a day when it's windy outside, close your windows and feel for air leaks. You can use an incense stick for this, too; watch the smoke trail, and if it becomes anything other than vertical, you have an air leak that is pulling air toward the windows. Typically, air leaks will be found at the edges where the window is hinged, slides, or meets another unit—such as between the two panels of a double-hung window.
Although you can tape plastic over the windows to seal them, this can be expensive and be rather unattractive. It can also reduce much-needed natural sunlight in the winter unless you use the shrink-wrap type of plastic seal. And some studies suggest that the energy required to manufacture and transport plastic window insulation kits far exceeds any energy savings you may enjoy. So a better and easier solution is to use inexpensive rope caulk to seal gaps around window moldings and between sliding window panes. Press the rope to caulk into all the joints where the air is leaking.
Doors
- Inspect caulking around the outside moldings of door frames, and add new exterior-grade caulking, if necessary.
- Inspect and replace any failed weatherstripping around doors, including the door sweep attached to the bottom of the door.
- Check for air leaks around doors using the incense-stick method described above, and use rope caulking where applicable to seal gaps.


Moving to the outside of the home, you should do a quick check of the roof. Either hire someone to inspect the roof if you are not comfortable doing this yourself, or inspect it yourself, wearing well-fastened shoes with non-skid soles.
- Check the roof for missing or damaged shingles, and have them replaced.
- Check flashings around chimneys and other roof projections, which are often the source of leaks. Have repairs made, if necessary.
- Make sure gutters and downspouts are clean, with no leaves or debris clogging them. Wet leaves remaining in the gutters over winter add significant weight and volume to the gutter when frozen, increasing the risk of damage. Make sure downspouts are solidly attached.


The sprinkler system should not be overlooked when preparing your home for winter. Have your sprinkler system winterized no later than the end of October.
If you have a lawn service that handles this, have them come to drain and winterize the irrigation system. Winterizing a sprinkler system is also fairly easy to do yourself. It involves shutting off the water, draining the pipes and blowing them free of water, then opening test cocks on the vacuum breaker to allow air into the system—this prevents trapped water from freezing and cracking the plastic water lines.


How you winterize a pool and spa will depend on what type you have since an above-ground pool can require much different procedures than an in-ground pool. Whatever water features you have, make sure to have a pool maintenance person perform all necessary winterization procedures. If you do this work yourself, make sure to carefully follow the pool or spa manufacturer's recommendations for winterizing it.


Lastly, you'll want to prepare your yard for winter, too. Make sure to follow standard lawn and garden care winterizing procedures, which entails proper fall care for the lawn, the flower beds and other planting areas, and particular attention to making sure trees and shrubs are properly pruned and well-watered for winter. After this work is completed, deal with outdoor furniture and other accessories:
- Cover patio furniture or bring it indoors to store for the winter.
- Seal or stain a wooden deck if it needs it before winter. A properly sealed deck will be more resistance to winter damage.
- Clean and seal any concrete or brick paver surfaces, as needed. Now is a good time to patch any cracks or damage to concrete steps or walkways.
- Drain the gas from your lawn mower, or just let the mower run until it is out of gas. Store the mower somewhere dry and safe for the winter.
- Drain any water fountains, unplug the pumps, and prepare for winter.
- Clean and store away shovels, pruners, and other garden tools.
- Clean, repair, and cover up (or store) barbecue grill equipment. It is much easier to do this in the fall than in the spring when you are eager to get grilling again.


www.thespruce.com

Comments